Change Images in Pages
Accessing Your Page
At Alstra Solutions, we use the Divi Builder to create beautiful, functional pages for your website.
Here's how to access and edit your pages:
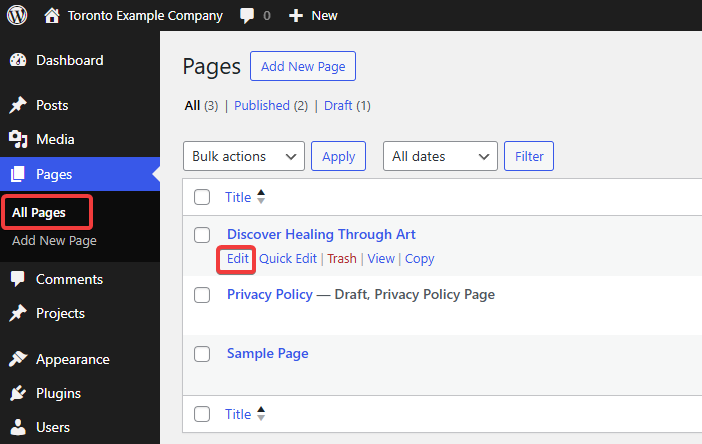
- Find Your Page
- Go to "Pages" in the left sidebar
- Click "All Pages"
- Find the page you want to edit
- Hover over the page title to see options
- Click "Edit"
Using the Divi Visual Builder
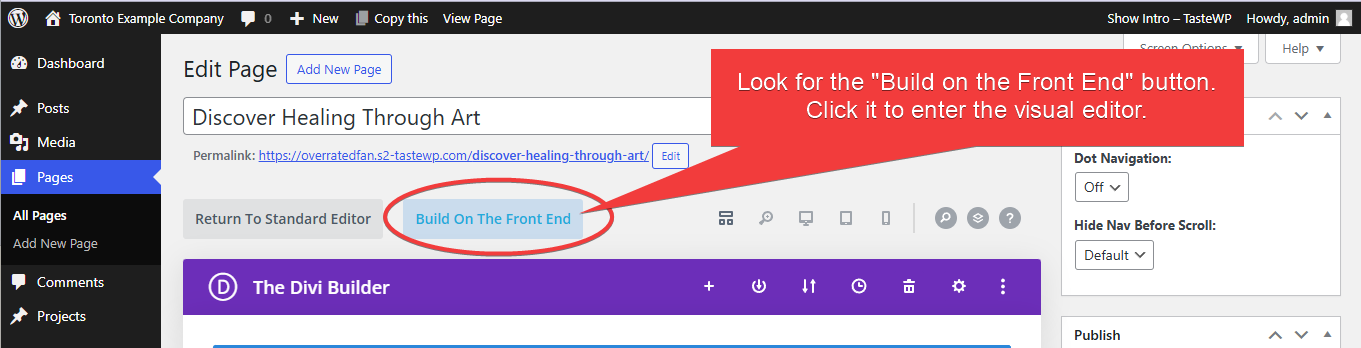
- Enter Visual Editor Mode
- Look for the "Build on the Front End" button
- Click it to enter the visual editor
- This gives you a real-time preview of your changes
- What you see is exactly how it will look on your website
Accessing the Image Block
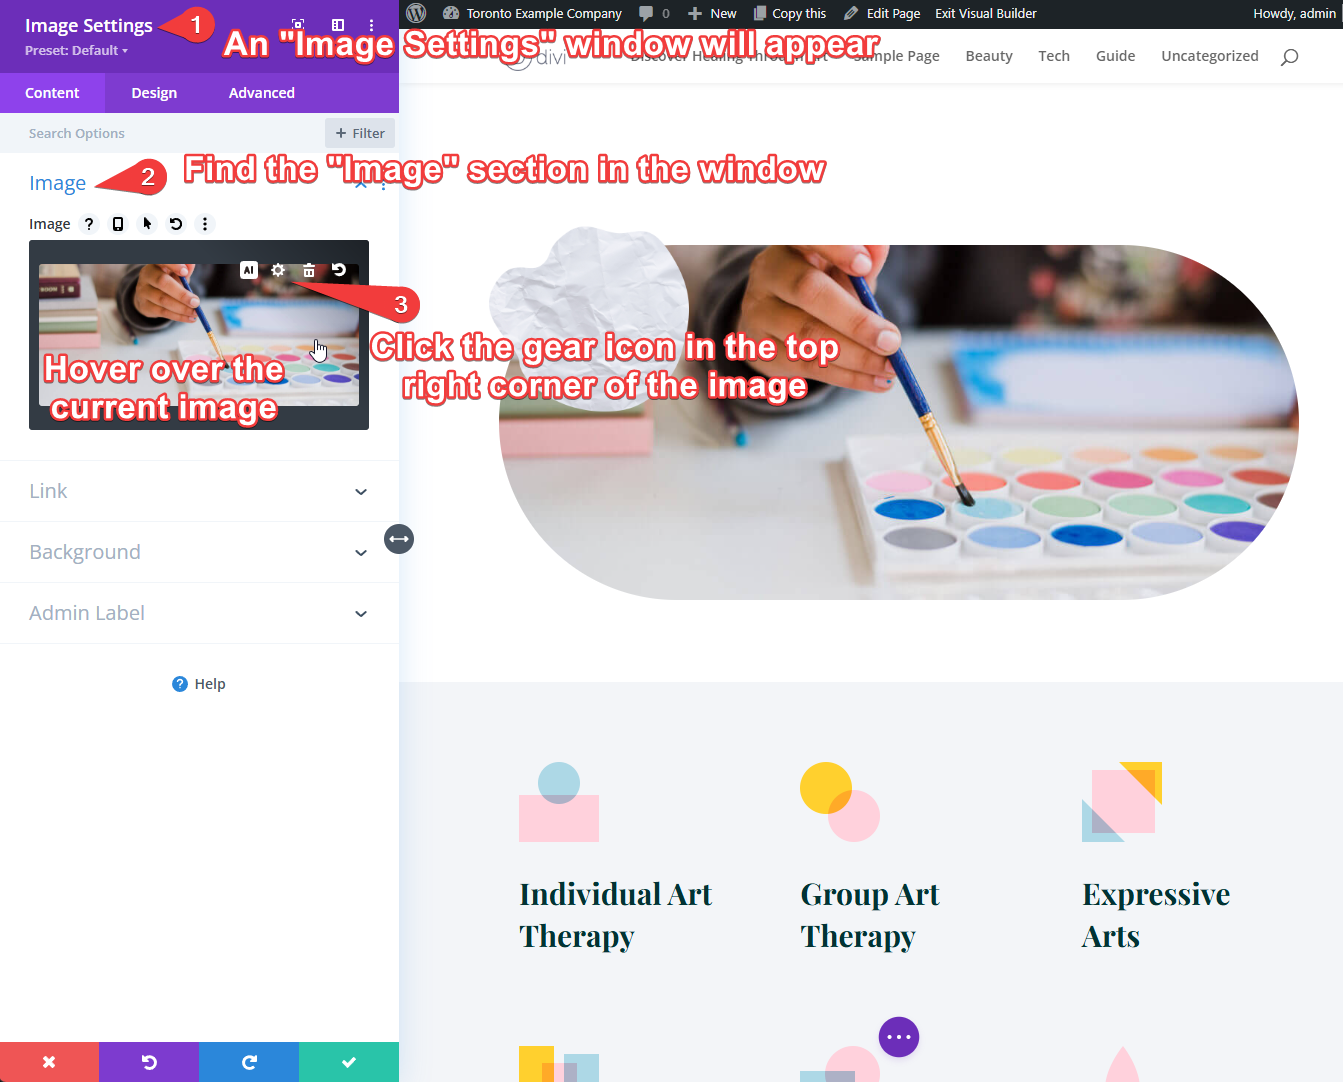
- Find Your Image
- Locate the image you want to change
- Hover over the image block
- Click the gear icon (⚙️)

- Open Image Settings
- An "Image Settings" window will appear
- Find the "Image" section in the window
- Hover over the current image
- Click the gear icon in the top right corner of the image
⚠️ Important Safety Note: Only edit text blocks with grey toolbars. Avoid clicking anything with green toolbars unless you're familiar with Divi Builder, as this could affect your page's layout.
Image Optimization Guidelines
-
File Size Requirements
- Keep images under 3MB (ideally under 1MB)
- Large images significantly slow down your website
- Slow websites can hurt your Google rankings
-
Image Format Recommendations
- Convert
.jpg,.pngimages to.webpformat for best performance - Use tools like CloudConvert for conversion
- WebP offers better compression while maintaining quality
- Convert
Selecting a New Image
⚠️ Important: Never use images found through Google searches or similar sources without proper licensing - using copyrighted images without permission can result in legal action and hefty fines. Only use images you own, have purchased, or have explicit permission to use.
-
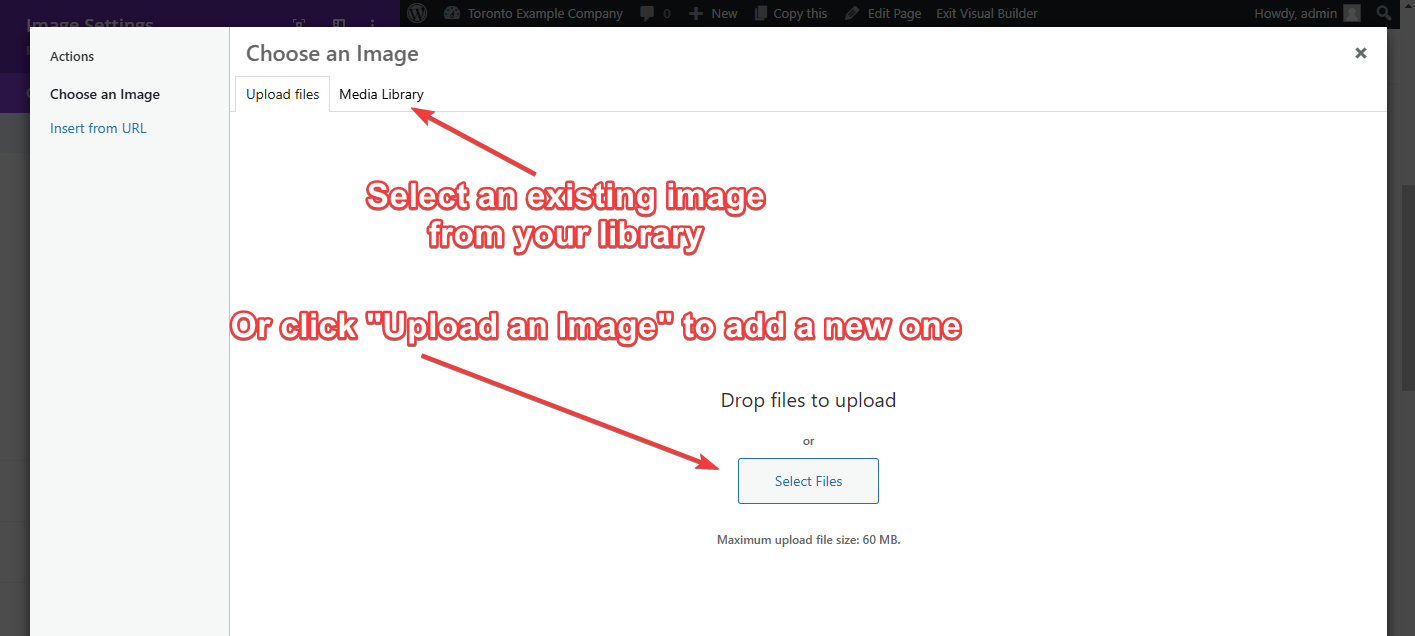
Choose Image Window
- A "Choose an Image" window will pop up
- You have two options:
- Upload a new image
- Select from your Media Library
-
Using Media Library
- Select an existing image from your library
- Or click "Upload an Image" to add a new one
- 💡 For details on managing your Media Library, refer to our Media Management tutorial
Applying and Saving Changes
-
Apply the Change
- Select your new image
- Click the green checkmark in the "Image Settings" box
- ⚠️ Important: This only applies the change but doesn't save it permanently!
-
Save Your Changes
- Look for three dots (···) at the bottom of the screen
- Click to expand the toolbar
- Find the green "Save" button in the bottom right corner
- Click "Save"
- Wait for the saving process to complete
- You'll see a checkmark appear in the "Save" button when finished


Important Tips
- Always wait for the checkmark to appear before leaving the page
- If you make a mistake, you can use the "Exit Visual Builder" button without saving
- Make one change at a time and save frequently
- If you're unsure about any feature, contact Alstra Solutions for guidance
Need Help?
If you're not sure about making changes or encounter any issues, please contact our support team. We're here to help ensure your website stays looking professional and functions properly.